This is how to configure OctoPrint/OctoPi for the TINA2.
-
OctoPrint is a tool that can manage your printer via a simple webpage. Or even control it remotely.
And every single guide from WEEDO/WEEFUN/ENTINA has been wrong sadly

But i've found a way! And this, is my new guide for the TINA2. Warning. TINA2 only. TINA2 Upgraded might require a bit more configuration. I'll say what I think can be configured for the TINA2S in Italic text. If something happens, I'M NOT RESPONSIBLE.
Also, just to add: OctoPrint does not mean you can just load in a AI to monitor your prints. 3D Printers may catch on fire. Monitor your 3D Printer.
TINA2
all firmware versions.
This guide considers that you, have done a succesfull install of OctoPrint/OctoPi already. If you have not, click here to see a guide.
-
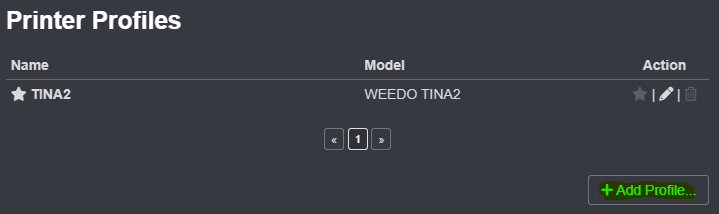
Open the OctoPrint settings menu. Press Printer Profiles.
-
Click Add Profile.
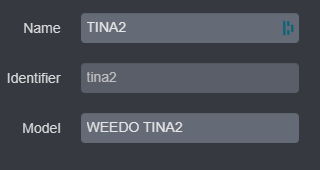
- In the general tab, type TINA2 as name and Model as WEEDO TINA2
- In the Print bed & build volume tab, set the following settings.
not sure if you just click heated bed it will work for the TINA2S?

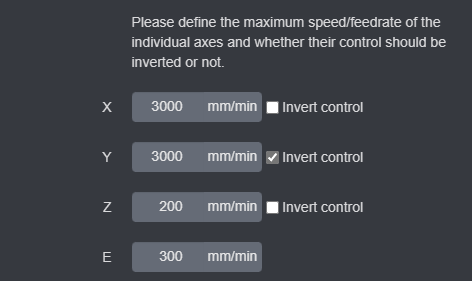
- Let's now change to Axes. Change the settings to the following:
-
Click save/confirm.
-
Go to GCode Scripts.
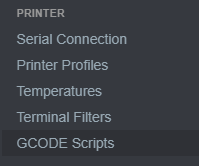
Enter W1 in Before print job starts
Enter W2 in After print job completes
Enter W3 in After print job is cancelled
Enter W4 in After print job is paused
Enter W5 in Before print job is resumed
Enter W6 in After connection to printer is established
Enter W7 in Before connection to printer is closed-
Now go to Serial connection. On Additional baud rates, set it as 1000000.
-
Click save. You are done!
-
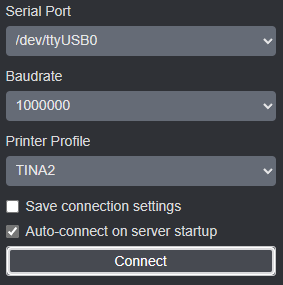
Now set your Serial Port, Baudrate as 1000000 and Printer Profile as TINA2.
You have now setup a full OctoPrint instalation for your TINA2.
Thanks for following my guide,
whatbeato "TINA2 Expert"
OctoPrint TINA2 Unofficial Guide
 2023 by whatbeato is licensed under CC BY-NC-ND 4.0
 -